

 Haris Khan
You put the controller down on the sofa, reach for a drink, and the camera on screen keeps slowly turning to the left. Nobody is touching the stick. That small ghost movement is stick drift, and it usually starts as a mild nuisance in menus before it ruins aiming in a shooter.
Learning how to fix stick drift starts with one honest point: some drift is a settings or firmware glitch you can clear in five minutes, and some is a worn part that no menu can repair. Microsoft even notes that its recalibration tool cannot fix drift caused by normal wear and tear.
So the order matters. Try the free software fixes first, then the free repair routes, and only then open anything or buy a new pad. Below are the official steps for the Switch 2, the original Switch, the PS5 DualSense and Xbox controllers, checked against each maker’s support pages on 15 November 2026, plus why Hall effect and TMR sticks are the long-term fix.
How to fix stick drift: the seven steps that work on any controller
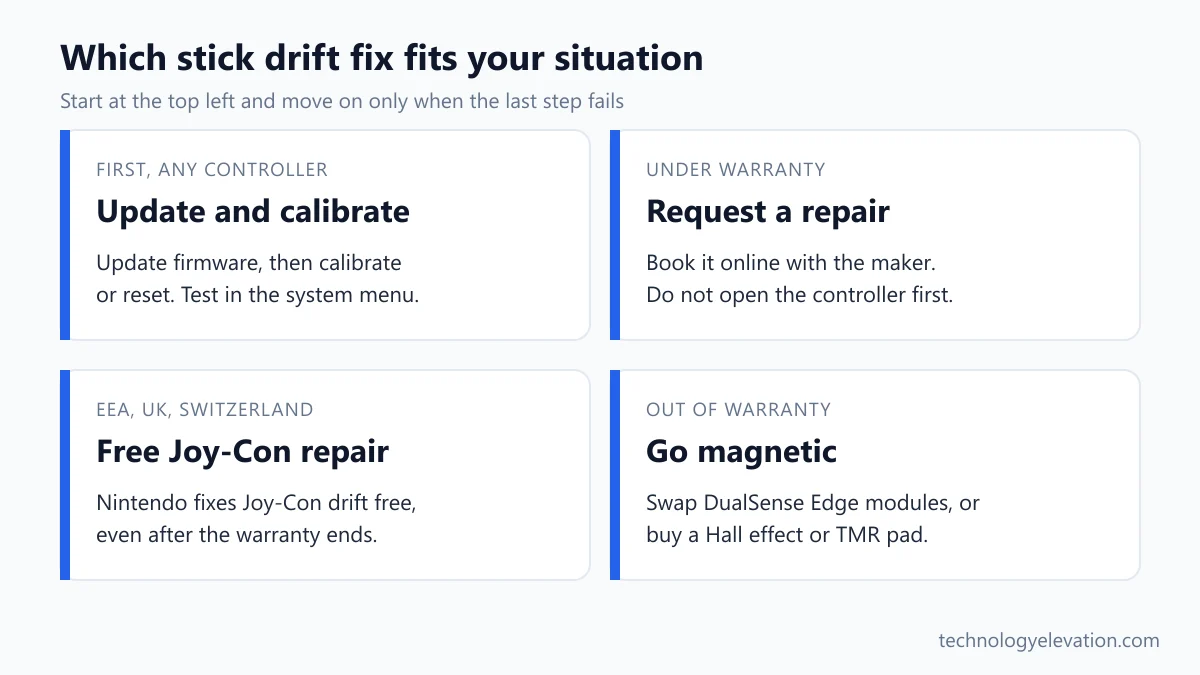
To fix stick drift, update the console and the controller, remove skins or grips, calibrate or reset the controller, and test it in the system menu. If it still drifts, use the maker’s warranty or repair service. Only after that should you swap sticks or replace the controller.
- Update the console’s system software.
- Update the controller’s firmware from the console’s controller settings.
- Take off any stick caps, skins or covers from the affected controller.
- Calibrate the stick (Nintendo and Xbox) or reset the controller (PS5).
- Test the stick in the system menu, not only inside one game.
- If drift shows up in only one game, raise that game’s stick dead zone.
- If it drifts everywhere, request a warranty repair or replacement before you open the case.
Step 5 trips up a lot of people. A game with a tiny dead zone (the small area around the centre that the game ignores) can make a healthy stick look faulty. Step 7 matters because opening a controller yourself can cost you a free repair.
Nintendo Switch 2 and Joy-Con 2 drift: calibrate in Controllers & Accessories
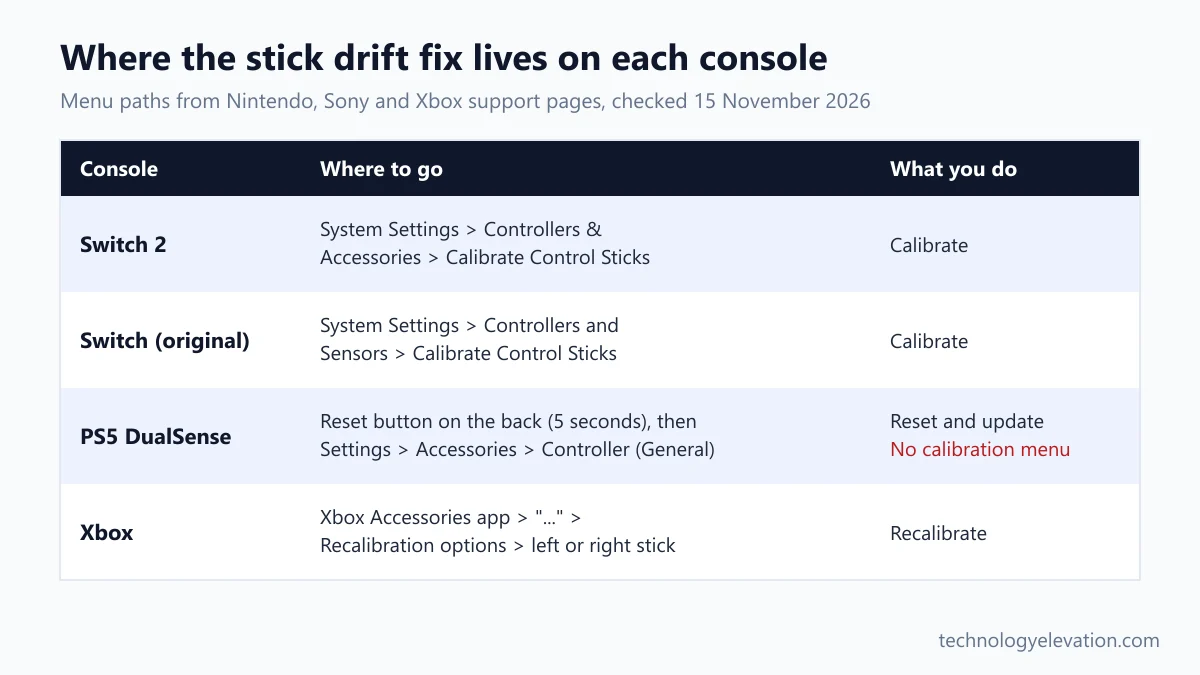
On a Nintendo Switch 2, open System Settings from the HOME Menu, select Controllers & Accessories, then Calibrate Control Sticks. Tilt the stick fully in one direction, hold it for a few seconds and follow the prompts. The same menu works for the Switch 2 Pro Controller.
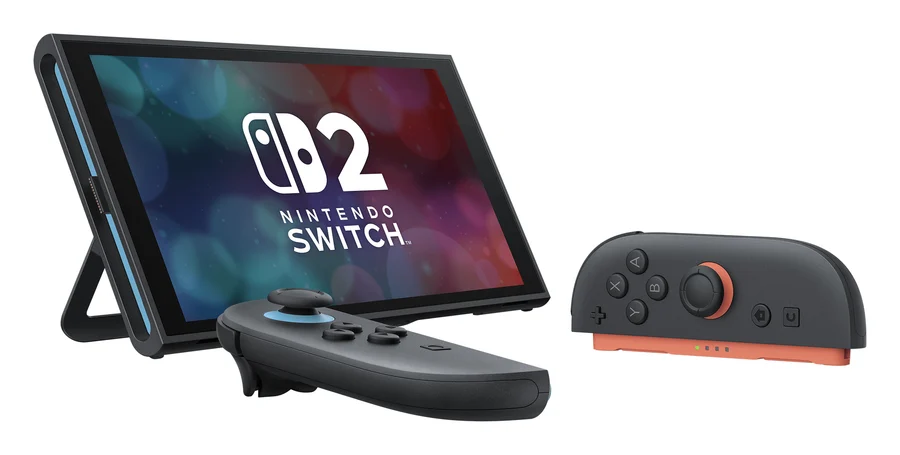
Nintendo’s Switch 2 support articles give these steps:
- Select System Settings on the HOME Menu, scroll to the bottom, select System, then System Update.
- In System Settings, select Controllers & Accessories, then Update Controllers to install the latest controller firmware.
- Remove any skins or covers from the Joy-Con 2 that drifts.
- Go back to Controllers & Accessories and select Calibrate Control Sticks.
- Fully tilt the stick you want to calibrate in any one direction and hold it there for a few seconds.
- Follow the on-screen prompts to check that the stick works.
- If the result does not show up straight away, put the console to sleep and press the POWER Button to wake it, or press the controller’s SYNC Button once and then any other button to turn it back on.
The SYNC Button sits next to SL on Joy-Con 2 (R), next to SR on Joy-Con 2 (L), and next to the USB-C port on the Switch 2 Pro Controller.
Before you blame the hardware, look for a wrench icon at the bottom left of the screen beside your controller. Nintendo uses it to show remapped inputs, so set the sticks back to standard and test again.
On the original Switch, the menu has an older name: System Settings, Controllers and Sensors, then Calibrate Control Sticks.
If calibration fails, Nintendo says the Joy-Con needs service and that you should not send in the console. In the US and Canada you book it through Nintendo’s online service request. Elsewhere, Nintendo points you to the nearest authorised service centre. Families still choosing a system can weigh repair routes alongside price in our casual gaming console comparison.
PS5 DualSense drift: reset the controller, since there is no calibration menu
The standard PS5 DualSense has no stick calibration screen in its settings. Sony’s first troubleshooting step is a reset: turn off the PS5, unplug the controller, hold the reset button on the back for at least 5 seconds, then reconnect it with a USB cable.
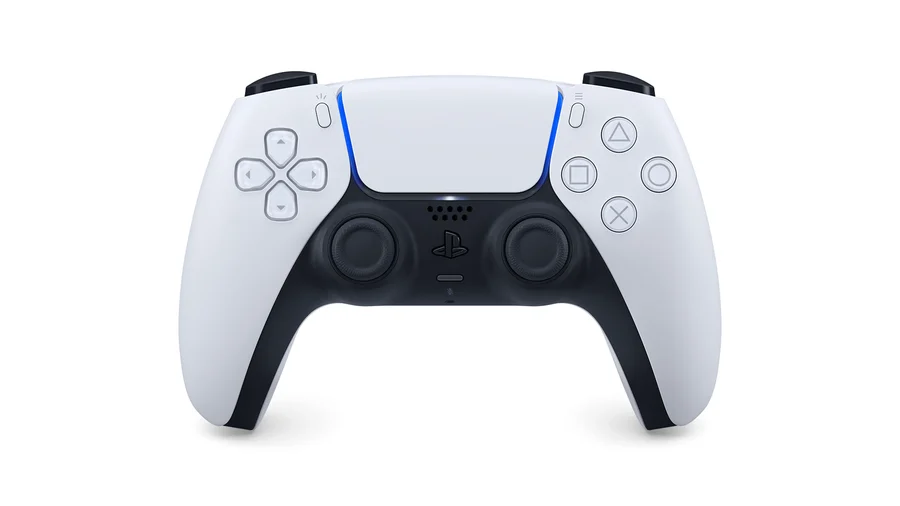
Sony’s DualSense troubleshooting page gives the reset in four steps:
- Turn off your PS5 console.
- Disconnect the DualSense wireless controller from the USB cable.
- Using a pin or similar tool, press and hold the reset button in the small hole on the back of the controller for at least 5 seconds.
- Connect the controller to the PS5 with the official USB cable and press the PS button.
Then check the controller firmware. Go to Settings > Accessories > Controller (General) and select DualSense Wireless Controller Device Software. Updates also arrive with PS5 system software updates.
If the stick still drifts after a reset and an update, Sony sends you to PlayStation Repairs at playstation.com/repairs, where “Button or analog stick issue” is one of the listed problems. Have the serial number ready: it is the 17-character code on the back of the controller, below the QR code.
The DualSense Edge is the exception to all of this. Its stick modules are designed to be swapped by the owner, and its custom profiles let you set stick dead zones. We cover the swap further down.
Xbox controller drift: use the recalibration tool in the Xbox Accessories app
Xbox Wireless Controllers and the Elite Series 2 can be recalibrated in the Xbox Accessories app on a console or a Windows PC. Open the controller’s device details, update the firmware, select Recalibration options, then pick the left or right stick and follow the on-screen steps.
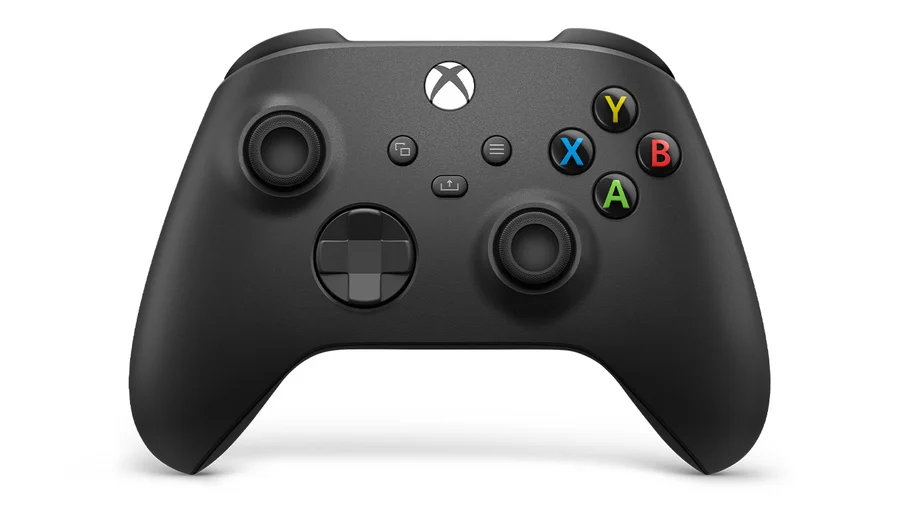
To open the app on a console, press the Xbox button to open the guide, then under Profile & system select Settings > Devices & connections > Controllers & headsets. On a PC, install Xbox Accessories from the Microsoft Store first.
- Open the Xbox Accessories app on your console or PC.
- On the screen for your controller, select “…” to open the device details screen.
- Check for a firmware update and install it before you recalibrate.
- Select Recalibration options.
- Select the stick you want to recalibrate (left or right).
- Follow the on-screen instructions. A “Calibration complete!” screen appears when it works.
If the stick still misbehaves, Microsoft suggests running the tool again and restarting the controller by holding the Xbox button for 5 to 10 seconds. If the same drift shows up on a second device, the controller may need repair or replacement.
The replacement request on Xbox Support asks for the 14-character serial number, found inside the battery compartment below the barcode (on the Elite Series 2, at the lower centre of the back).
The same Accessories app runs on Windows, so PC players get the identical tool. If you are shopping for a PC pad anyway, the stick type matters more than the colour, and our list of the best PC controllers flags which models use magnetic sticks.
Free repairs and warranties for stick drift depend on where you live
Stick drift is usually covered while the controller is under warranty. Outside it, the big difference is Europe: Nintendo repairs drifting Joy-Con for free in the EEA, UK and Switzerland, even after the 24-month warranty ends and even when wear causes it.
| Maker | Standard warranty | Drift repair route | Free after warranty? |
|---|---|---|---|
| Nintendo (US and Canada) | 12 months, covers controllers | Online service request for the Joy-Con only | Not stated by Nintendo |
| Nintendo (EEA, UK, Switzerland) | 24 months | Book through Nintendo Repairs | Yes for Joy-Con drift, until further notice |
| Sony PlayStation (US) | 1 year for accessories | PlayStation Repairs, “Button or analog stick issue” | Not stated by Sony |
| Microsoft Xbox | Checked by serial number | Controller replacement request on Xbox Support | No, but US owners can buy official parts |
Nintendo’s European drift repair page says it will not charge for repairing the “responsiveness syndrome” in the EEA, UK and Switzerland, whether a defect or wear and tear causes it. The page is written for the original Joy-Con. Joy-Con 2 owners in those regions should raise it when they book.
Nintendo can refuse the free repair if third-party accessories, accidental damage or commercial use caused the problem, or if someone outside Nintendo’s network has opened the controller.
Stick drift happens because potentiometer sensors wear out
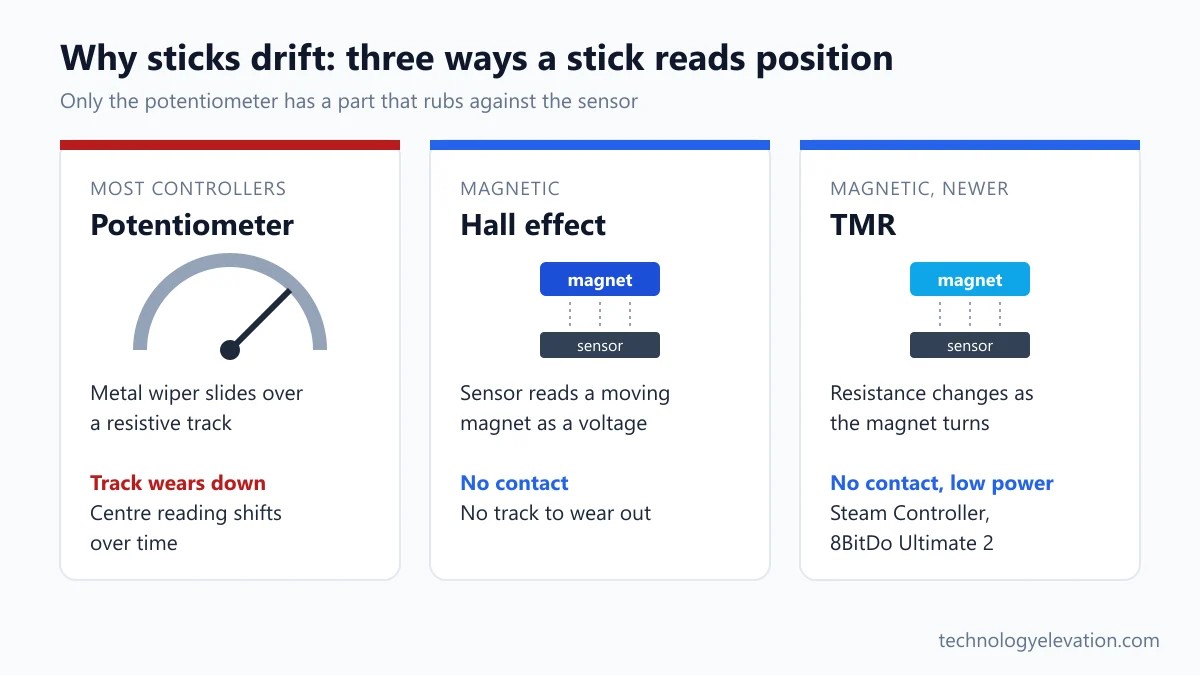
Most controller sticks measure position with potentiometers: a small metal wiper slides over a resistive track, and the voltage changes with the stick’s angle. Years of friction wear that track down, so the controller reads movement when the stick sits at rest.
Each stick has two of these sensors, one for left and right and one for up and down. When a track wears unevenly, or grit gets between wiper and track, the “centre” reading shifts. The game sees a push you never made.
Software can hide a small shift. Calibration teaches the controller a new centre, and a bigger dead zone tells the game to ignore small readings. Neither stops the wear. So drift that calibration hides on a worn stick tends to come back.
Grit also explains why compressed air sometimes seems to work: a puff around the stick base can clear it for a while. On a worn track, the drift returns.
Hall effect and TMR sticks fix drift at the source
Hall effect and TMR sticks fix drift at the source because nothing rubs against a sensor. A small magnet moves with the stick, and a magnetic sensor reads its position from a short distance away. No wiper and no resistive track means no track to wear out.
Hall effect sensors produce a voltage when a magnetic field passes through them. Allegro MicroSystems, a major maker of these chips, says in its Hall effect applications guide that contactless Hall sensing virtually eliminates mechanical wear and fatigue.
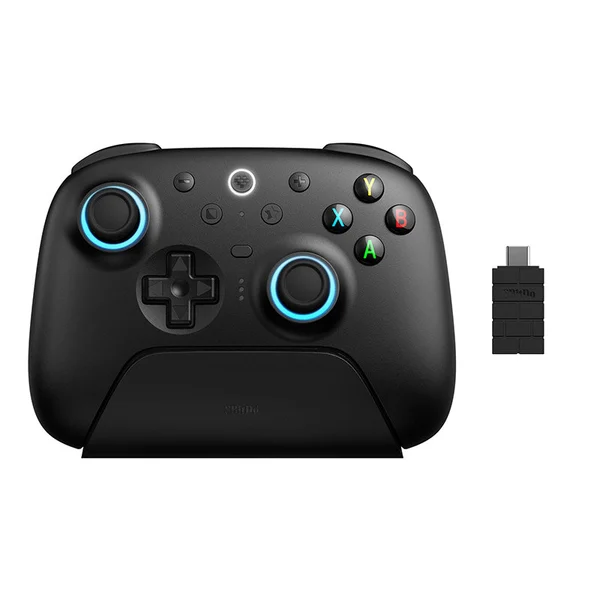
TMR (tunnel magnetoresistance) is the newer option. A TMR sensor changes its electrical resistance as the magnet’s field turns, and TDK describes its TMR gaming sensors as contactless, wear-free and ultra-low-power. Lower power is the practical win in a wireless controller: 8BitDo says the TMR sticks in its Ultimate 2 Wireless consume less power, which helps battery life.
Valve’s new Steam Controller uses magnetic thumbsticks with TMR technology, which Valve says are designed for long-term reliability. Magnetic sticks are not immortal: springs and the gimbal that holds the stick still wear. But the worn resistive track behind classic drift is simply not there. That is why so many of our PC controller picks use magnetic sticks.
Swapping sticks yourself is possible, but only some controllers make it easy
Among first-party controllers, only the DualSense Edge has sticks you can swap without tools. On standard DualSense, Xbox and Joy-Con controllers, a DIY stick swap means opening the case, and on many pads desoldering, which can void the warranty or a free repair.
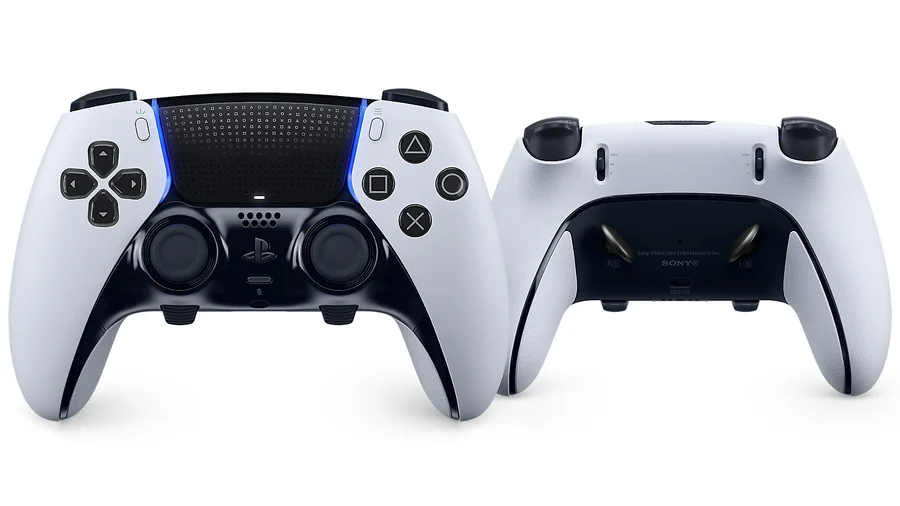
Sony’s DualSense Edge support page lists six steps:
- Make sure the player indicator is off. If it is on, hold the PS button until it turns off.
- Disconnect the USB cable.
- Slide the RELEASE latch on the back to remove the front cover.
- Raise the release lever.
- Remove the stick module and slide the new one along the grooves until it clicks.
- Lower the release lever and push the front cover back on until it clicks.
Sony sells modules separately, at a $19.99 launch price (the controller launched on 26 January 2023 at $199.99). Left and right modules are interchangeable, so one spare covers either side.
Microsoft takes a different route. In the US, it sells official replacement parts for out-of-warranty Xbox Series X|S controllers, including a replacement circuit board, rates the job as needing moderate technical skill, and recommends recalibrating both sticks after fitting a new board.
Aftermarket Hall effect sticks exist for many controllers too, but fitting them usually means soldering on a crowded circuit board. If you have never held a soldering iron, a new magnetic-stick controller costs less than a ruined board.
When a new controller beats another repair
Replace the controller when it is out of warranty, calibration and a reset no longer help, and no free repair applies in your region. At that point, a controller with Hall effect or TMR sticks is the better buy than another identical pad.
For PC players, that choice is easy, because many PC pads now ship with magnetic sticks, as the best PC controllers list shows.
Console players have fewer options, since first-party pads dominate. If drift has you rethinking which system to own, compare controllers and prices in the best gaming console for casual gamers.
Heavy PS5 players can weigh the DualSense Edge, with its $19.99 stick modules, against replacing standard pads. It sits alongside other add-ons in the best PS5 accessories.
Phone gamers face the same issue: mobile game controllers have analog sticks too, so check the sensor type before you buy.
Frequently asked questions about stick drift
Can stick drift be fixed permanently?
Drift caused by settings, firmware or dust can be fixed for good with an update, calibration or cleaning. Drift from a worn potentiometer only goes away permanently when the stick is replaced, ideally with a Hall effect or TMR stick that has no resistive track to wear.
Does compressed air fix stick drift?
Compressed air can help when dust or grit sits around the base of the stick. Use short bursts while tilting the stick. If the sensor itself is worn, the drift comes back, because air cannot repair a worn track.
Can you calibrate a PS5 controller?
The standard DualSense has no stick calibration menu on the PS5. Sony’s first step is to reset the controller with the button on the back, update its firmware, and then use PlayStation Repairs if the stick still drifts.
Does Nintendo fix Joy-Con drift for free?
In the EEA, UK and Switzerland, Nintendo repairs Joy-Con drift for free until further notice, even outside the 24-month warranty and even when wear causes it. In the US and Canada, controllers have a 12-month warranty and you book repairs through Nintendo’s online service request.
Is stick drift covered by warranty?
Usually, yes, because a drifting stick is a hardware fault. Nintendo, Sony and Microsoft each run an online repair or replacement request for controllers under warranty. Do not open the controller first, because that can cost you a free repair.
Do Hall effect sticks drift?
Hall effect sticks do not suffer the classic wear drift, because a magnet and sensor replace the rubbing wiper and track. They can still feel loose as springs and other mechanical parts age, and they still benefit from calibration.
Last checked and sources
Last checked on 15 November 2026 by Haris Khan. We followed each step against the makers’ current support articles and warranty pages and kept only what they state.
- Nintendo Support: Switch 2 and Switch calibration articles, Joy-Con and Joy-Con 2 stick troubleshooting, Warranty and Service Information
- Nintendo UK: Joy-Con responsiveness syndrome (“drifting”) repair page
- PlayStation Support: DualSense troubleshooting, controller support, DualSense Edge stick module replacement, US accessory warranty; PlayStation Blog DualSense Edge announcement
- Xbox Support: Accessories recalibration tool, controller replacement, Series X|S controller replacement components
- Allegro MicroSystems Hall Effect IC Applications Guide; TDK InvenSense gaming sensors; 8BitDo Ultimate 2 Wireless; Valve Steam Controller
- iFixit: DualSense Controller Stick Drift wiki
We update this guide when console makers change their menus, repair policies or controller hardware.

GIPHY App Key not set. Please check settings